If your domain is hosted with our company, you will be allowed to create your own email addresses for your business. The simplest way to create your email account is to do this within your client portal.
Client Portal Login: https://shop.wwwebdesignstudios.com/login
1. Create Email Accounts
If you want to create an email account, log into your client portal then navigate to: Portal Home > Client Area > My Products & Services
Find the hosting service in the table, click on the row, then scroll down to “Quick Create Email Account”.
Username: The username is always the email address in which we send invoices to. If you do not know your password you will need to click on "Forgot Password" and go through the process of resetting your password first.
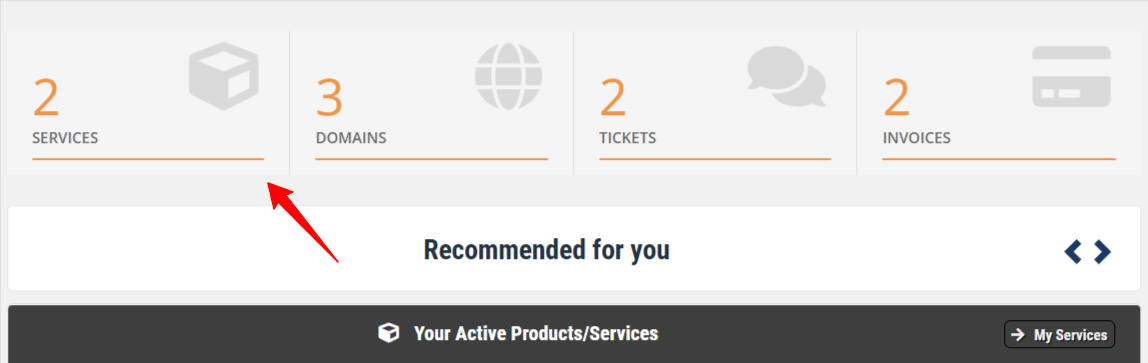
Once logged in your will see a box that shows the number of active "Services". Click on this box as shown below:
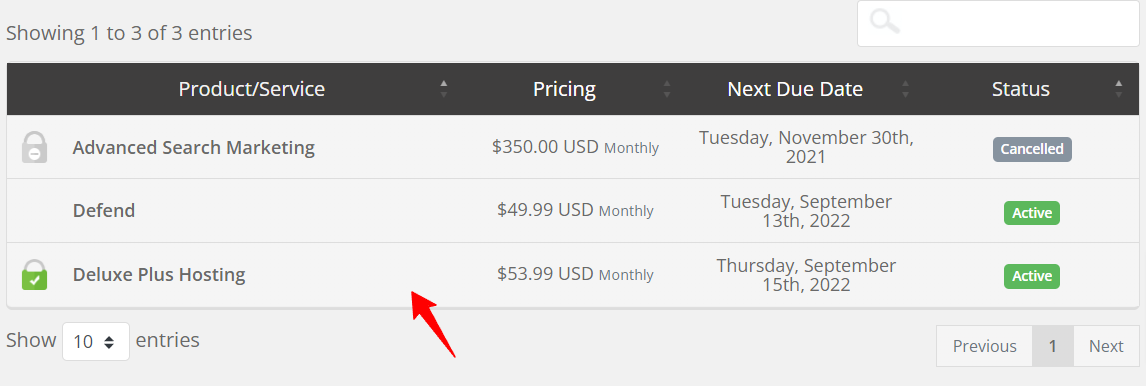
Next you will find your hosting account and click on this service as shown below:
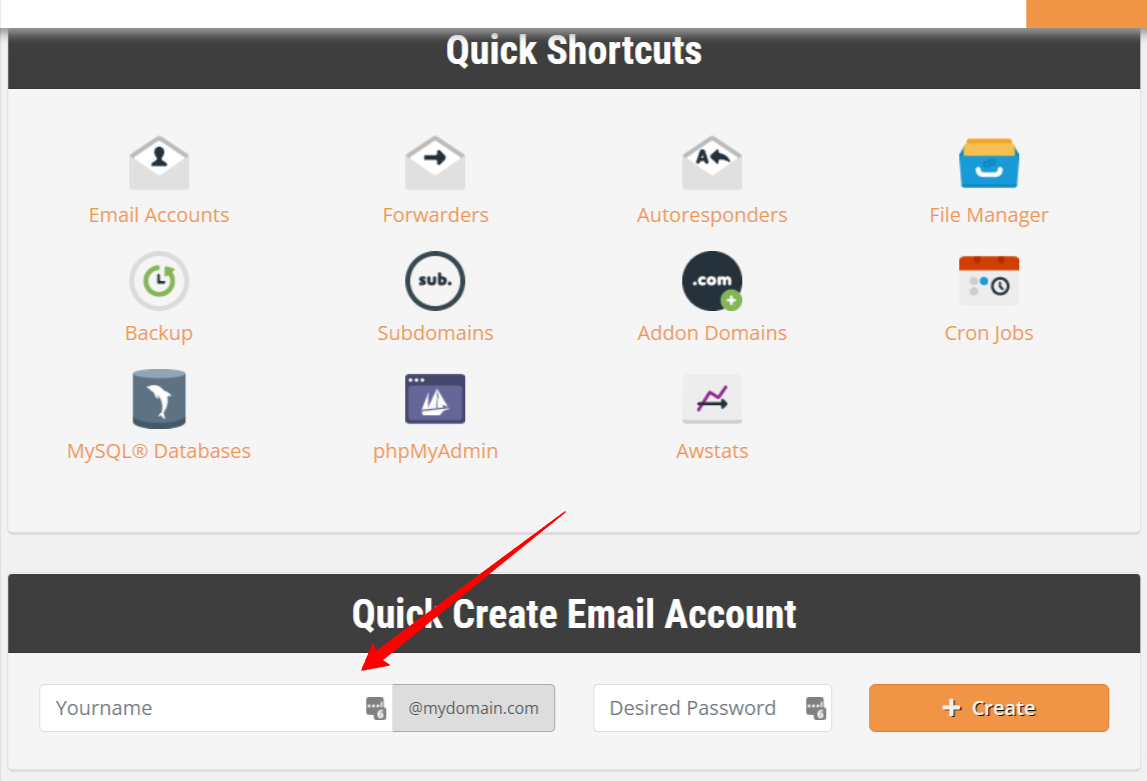
Next, you will scroll down to the section that states "Quick Create Email Account" - as shown below:
Once you click on "Create" the email address will be created with that password. Please make sure to write down your password so you can reference this in the future. Changing your password later on will require access to the Webmail feature or by creating a support ticket.
Now once your email addresses are created the next step is to access them. You have 2 choices in using the emails: Using our webmail, Installing the email on a mail client.
2. How To Access Email Account Using Webmail
On the left sidebar you will see “Log in to Webmail” and login with the email/password you just created. Webmail can also be accessed by typing your web browser your website address and adding at the end "/webmail". You would then login using the email/password.
3. Webmail Information
Here you can create email forwards, access your email, adjust spam settings, and instructions on how to add the email to your devices in the (configure mail client) area. Most devices will add the email with just the username/password but sometimes you need to enter the hostname and adjust the ports.
For iPhones Only: iPhones are tricky on installing business emails. It might be easier to use the installer attachment. If you do, you will need to go to the area “Set up email on your device”.
- 1. Select Device
- 2. Enter Email (you must already have on your phone)
- 3. Make sure to only check “Email”, not calendar or contacts.
- 4. Click Send
This will send an email which will have an attachment. Click on the attachment, follow the instructions, make sure to say “Yes” to everything and you will only need to enter the password to complete setup.
